Tuesday, August 31, 2010

Home Education for Preschoolers


Little ones are like sponges!  I am constantly amazed at what my two year old daughter retains, often after only hearing or seeing something once!  She is eager to learn and I want to take full advantage of this time and not miss a precious opportunity to teach her about God, about creation and about life. 

I was inspired by reading about what other moms are doing with their preschoolers but didn't want to pay for a curriculum just yet.  I also wanted to have the flexibility to come up with my own plan and not feel like I needed to adhere to someone else's lesson plan.  I wanted the teaching to center around God and give Him credit for all He has made.  I came up with five categories that I wanted to teach Audrey more about:
  • God Made Animals
  • God Made Plants
  • God Made Our Bodies
  • God Made Our Earth
  • God Made Our Day

Some categories will take longer to cover while others will be only a week or two.  Under each category I came up with subcategories and we will cover one each week.  For each subcategory I make a list of crafts to do together, books we own to read, themes to discuss, field trip ideas and also music or videos to listen to or watch.  We also go to the library each week and pick up quite a few books that correspond with the topics we are learning about.  I try to find a few titles that are educational and a few that are just fun or fiction.  I want this to create a love of reading and learning and not feel like work at all.  I am also giving myself lots of grace- if one week is too hectic to take on a new category we will just put it off a week and maybe continue to review last week's theme.

The Internet has been such a help in coming up with ideas!  I search Google Images for line drawings that can be traced for coloring pages.  There are so many websites offering preschool craft ideas.  When I am feeling not so creative these have been really helpful!  I look for videos on Youtube that would be educational (always preview first!).  There are all kinds of sites like the National Wildlife Federation that offer tools for teaching children.  Whenever I come across something useful I save it to a special folder in my favorites so I know right where it is when I need to refer back to it.

I find that the hands on learning experiences are the most fun and memorable.  Making a craft together, going to a farm or even a trip to the pet store will make such an impression on a little one!  It really doesn't take much to engage your child and make learning so fun.

So far our home education has been such a treat for both of us!  Now every day Audrey asks when we are going to do our craft.  I know I will look back and be so glad I was intentional about teaching her things and spending quality time with her!

Thursday, August 26, 2010

Teaching Our Children to Look to God

What is your child's first response when something isn't right?  When an illness causes discomfort, when a fear comes up, when something is out of our control?  And more importantly, what is your first response in these situations?  I wish I could say that mine is always to turn to God in prayer.  It often is, but not every time.  I have tried to teach Audrey to think this way, to look to God when she is in need, and it seems to have worked. 

A few weeks ago we were on our way home from church and I casually mentioned having a headache.  Immediately the response from the back seat was, "Mommy!  I want to pray for you!"  After chewing up her snack, Audrey held my hand and prayed a sweet and simple prayer for my head to "not feel bad."  I was so blessed by her quick and correct response to my need.  We have taught her that Jesus heals and I love seeing her child like faith in action.  I am so thankful that the good things we have sown into her are taking root and bearing good fruit.  I feel like I fall so short so often and it is times like these that I feel such encouragement to press on. 

I have seen God's faithfulness all throughout my life.  I know that God still heals based on His Word, but also because of personal experience.  My little sister was born blind.  Her optic nerves had not developed and she was completely unable to see.  My mom took her to three different doctors and they all gave the same diagnosis.  They all said there was nothing that could be done, no hope of her receiving her sight.  My mom refused to accept that her child would never see so my parents took her to be anointed and prayed for at our church (based on James 5: 14 and 15).  The following evening they observed for the first time, Lauren following a moving object with her eyes.  She was completely healed and now doesn't even wear glasses.  This testimony has been such a powerful force in my life.  Even in times when I strayed from God, I always knew that He is real and that He cares about me.  I want my children to grow up with that same sense of God's love and power.

Children are never too young to learn about God and to hear about His love and faithfulness.  They are little sponges, thirsty to suck up anything we put before them.  We must be so diligent to seek out good things that nurture faith and godly character in our little ones!  Spending time reading Christian children's books together, listening to worship music or scripture put to song, and patiently explaining who God is to our children really pays dividends.  Our favorite books to read together right now are two that I had as a child and remember enjoying the rich detail in the illustrations.  They are Big Thoughts for Little People and Giant Steps for Little People.  Both are available through Amazon and teach biblical truths and godly character.  We are also enjoying listening to God's Word from A to Z by Abe and Liza Philip and also the Seeds Family Worship music.  Both are available through the Itunes Store and make scripture memory so easy.

Wednesday, August 18, 2010

Make at Home: Simple Display Solution for Children's Art


Arts and crafts are such a fun part of childhood but can be a challenge to display.  My daughter LOVES for her art work to be appreciated and cherished!  I will never forget the time I was decluttering our (cluttery) art display during nap time and forgot to cover the evidence before Audrey woke up.  She saw her prized creation in the trash and I wanted to sink into the floor.  I felt like the worst mom ever!  I just had to weed out some of the art to make room to display new pieces.  I had no idea it was such a special piece and we immediately made a new one.  Thank God I had the supplies we needed!  I learned how special her art is to her and will never make that mistake again!  I have been trying to find a way to show off more of her art in a way that is playful and fun just like the art itself.  I didn't want to spend a lot or be stuck with something unattractive so I decided to just stick push pins in the wall and string ribbon between them.  Art can be clipped to the ribbon with clothes pins and they can be easily changed out as new pieces are created.  I am also planning on buying a large acid free box to store the pieces that I take down (most of them anyway).  The art adds a fun, child friendly feel to her play room and makes her feel so special!

Friday, July 30, 2010

Make at Home: Hair Bows


Making your own hair bows and clips for your children is so simple and frugal!  My daughter has never been very happy to wear a hair accessory for more than a few minutes and even used to pull them out of other little girl's hair as a baby!  Now that she is two and has more hair to hold them, she will wear a clip or bow for an hour or more if she forgets it is in.  She loves to hold them and can't see them when they are on her head I guess.  For this reason, I have not wanted to spend much on cute little bows that will be pulled out and possibly lost.  In two years I have only purchased 5 clips and bows for her and we are now down to 2.  With her hair in a growing out stage it was time to do something! 

So I ordered Alligator Clipsonline (my local beauty supply store did not have what I was looking for) and went to my favorite fabric store for ribbon.  I purchased a small bag full of ribbon for around $20 and the box of 80 clips was about $13 shipped.  Despite my desire to keep chemicals out of our home, I did break down and purchase fray check when I realized that the non toxic glue I planned to treat the ends with would not securely keep the ribbons from fraying. Fray Check cost me roughly $3 at a local craft store and Amazon also has it.  (I got rid of all my nail polish a few years ago or I would have used clear nail polish instead.)  With these supplies and a hot glue gun I can make dozens of hair bows to coordinate with her outfits.  The bows and clips I have purchased in the past ranged from $3 to $5 so it really is a significant savings over purchasing them pre-made.  So far they have all been simple embellished clips but I hope to make some actual bows soon! 

This was a great mommy craft that I enjoyed one afternoon during nap time.  I ended up with 7 new bows and a holder for the wall!  To make a simple bow display just cut two pieces of ribbon to your desired length.  Treat the ends with clear nail polish or Fray Checkand hot glue one over the other.  Sew a simple loop on the back for hanging by a nail and you are finished!  This keeps your bows out to be enjoyed and easily accessed.  Audrey loves her new bows and holder and I had fun making them!

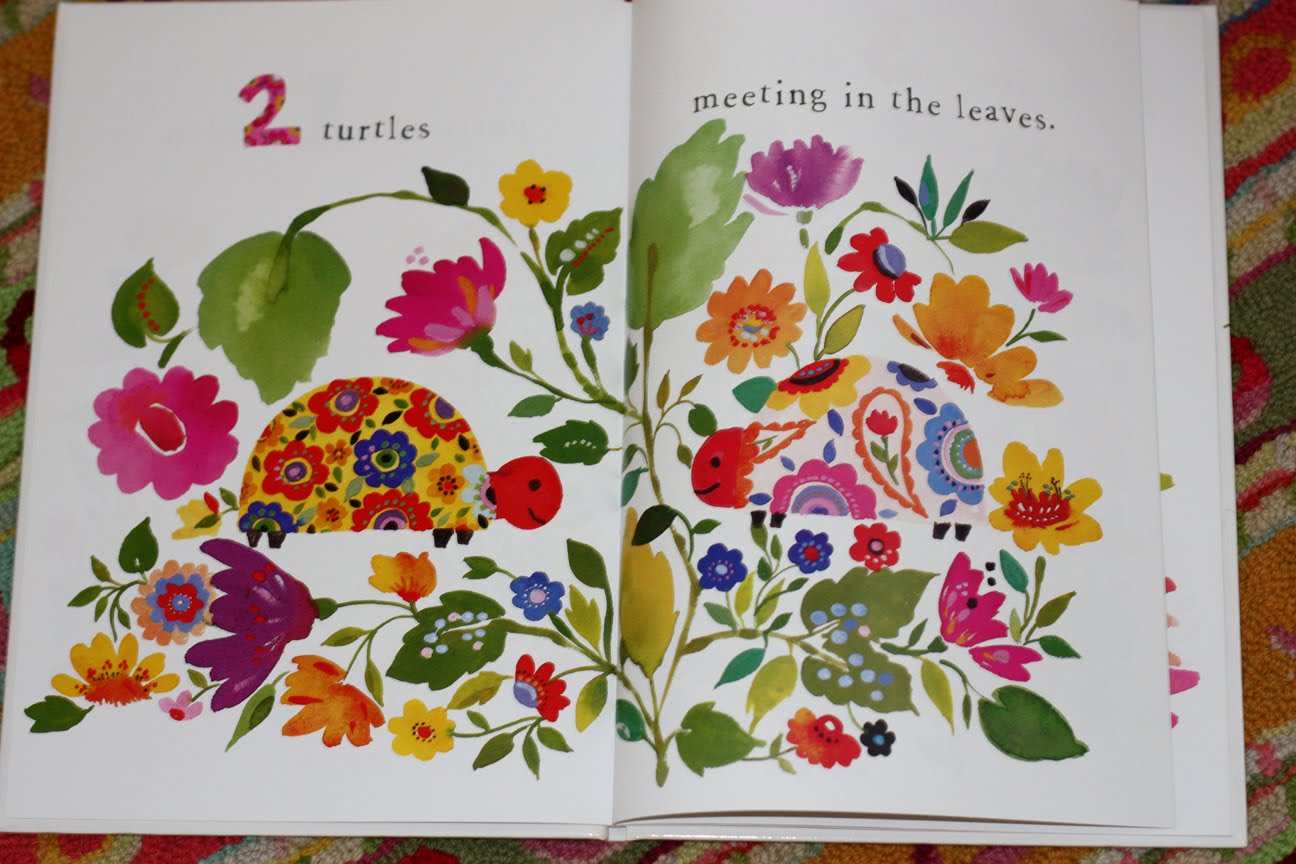
Children's Book Review: Counting In the Garden by Kim Parker


Lately Audrey's favorite book has been Counting In The Garden
by Kim Parker.  It is such a cheerful, fun book that helps children learn their numbers.  Kim is an amazing artist and her work is so beautiful!  Each page is rich with creative, colorful flowers and lovely animals and insects to count. 


Whenever we read it (which is like 5 times a day) Audrey points her finger and wants me to trace each number with it.  This book really makes learning fun and it is so beautiful!  I was thinking of buying a second one to frame some of the pages for our kid's rooms.  It seems the book may not be in print anymore but is still available through Amazon.
 
I also found that many of the pages from the book are available as prints to be framed.  For more of Kim's beautiful work check out her gallery.

Thursday, July 29, 2010

Keeping a Healthy Snack Close at Hand

Isn't food in Summer wonderful!  I have been in awe lately of all the fabulous produce we get every week from our farmer's market, CSA (Community Supported Agriculture) and even our own garden.  It feels so good to eat such perfectly ripe foods just moments or days after they are harvested.  With a fridge full of delicious fruit I decided to start keeping a fruit bowl on the counter every day to encourage us to eat more of it.  I know it is helping us eat healthier snacks by keeping us out of the pantry.  We all could use a little more fresh in our diet and this has really helped!

Friday, July 23, 2010

Cloth Diapering- Easier Than You Might Think!

Audrey at Two Months Wearing Fuzzi Bunz!
I love cloth diapering!  I have been diapering Audrey in cloth since she outgrew newborn disposables.  We do use disposables for times when we run out of cloth, when she is in a nursery or when carrying around dirty cloth diapers would be inconvenient.  I imagine she is in her cloth diapers 85-95% of the time. 

Like many new moms, I was very interested in cloth diapering but was afraid it would be a mistake.  I was afraid it would be so gross that I would regret spending so much up front for my diapering system.  I knew once I invested a lot in diapers there was no going back!  I was also unsure about their performance- I was not interested in spending a lot on leaky diapers!  My fears were put to rest however when we took the plunge and tried Fuzzi Bunz pocket diapers.  I spent hours reading and comparing all the available options and found Fuzzi Bunz to be the best fit for us.  They are pricey (I paid between $18 and $20 per diaper) but with proper care, certainly pay for themselves over time.  Fuzzi Bunz were similar in price to other pocket diapers and all in ones (AIO).  They are far more expensive then classic prefolds that are used with diaper covers, but for the convenience and comfort to baby I think the pocket diapers are worth the extra cash.  I have since tried an AIO diaper and another brand of pocket diapers, both of which I was unhappy with.  My daughter refuses to wear the particular AIO I purchased as it is rougher against her skin than the fleece of the Fuzzi Bunz.  The other pocket diaper I tried is acceptable, but the proportions make it not fit as well as Fuzzi Bunz.

Pocket diapers are made of two layers between which you insert the absorbent pad (or pads) that will determine how much the diaper will hold.  The customization is great!  For smaller children who wet less at a time, the single liner or insert is perfect.  For overnight use you can add a doubler or soaker pad to hold more moisture.  Now that my daughter is 2, I find that the single insert is not enough and I use two inserts or an insert with a doubler around the clock.  This does make for a bulkier diaper, but I don't think she minds.  Each diaper comes with one insert and doublers are sold separately.  Of all the doublers I have tried, I love my hemp ones (BabyKicks Hemparoo Joey Bunz) the most because they are very absorbent.

Fuzzi Bunz are made with a soft fleece layer on top (against baby's skin) that rarely stains and helps to keep baby a little drier.  They have snaps rather than Velcro which is nice during laundering and the snaps are harder for little hands to open- a huge plus!  When I purchased them, the one size fits all option was not available so I purchased smalls and now Audrey is wearing mediums.  I did buy one of the one size diapers recently and really like it.  It has elastic in the leg that can be easily adjusted for a snug or loose fit.  I can't imagine this diaper on a tiny newborn, but I am sure it will continue to fit my daughter until she is no longer wearing diapers.  If I had it to do over, I would probably still have purchased the smalls and then the one size diapers once she outgrew the smalls.

One problem I have encountered is the elastic not standing up to so much washing and wear.  I found a tutorial online showing how to replace the elastic.  It was a pain to do, but will add a not of use to my diapers.  Compared to spending $18 or more per diaper again, I can spend a few hours replacing the elastic! 

Another thing I love about cloth diapering is using cloth wipes!  They are so thick and so much cheaper than disposable wipes.  Also I use half as many cloth wipes getting her really clean than I do with disposables.  I found the thicker terry cloth wipes to be the best.  I simply wet a handful of wipes with tap water and store them in a wipes warmer.  I found no need to make a cleaning solution to soak them in.  I sometimes will add a few drops of tea tree oil to the wipes (making sure it is diluted with the water).  When I feel she needs a little more than just the wet wipes I will use a diaper spray such as California Baby to get her extra clean.  I use a large trash can with a lid that can be operated with a foot pedal.  Inside the can I use a cloth diapering pail liner that I take out and wash with each diaper load. 

Washing cloth diapers isn't that bad.  I find that if you don't have too many diapers you will wash more often and the smell will not get as strong.  When Audrey was little I remember being pleasantly surprised at how her diapers did not smell that bad.  Especially for exclusively breastfed babies this is true.  Now that she is older, the ammonia smell is pretty tough but I think it is still worth it.  I would strongly recommend using disposable gloves for processing your diapers!  I don't separate the liners from the pockets when I am changing diapers so wearing gloves to do it as I put them in the washer is a big help.  I add all my diapers and wipes to the load and run a prewash cycle with no soap before adding the pail liner to the main wash.  I use Charley's Soap because it doesn't have any fragrances or garbage that we try to avoid in laundry detergent and it leaves no residue to irritate baby's delicate skin.  It is also very economical and concentrated.  So after the prewash, I run a heavy wash cycle on hot with vinegar in place of fabric softener and a second rinse at the end. 

To dry them I throw my diapers, wipes and liner in the dryer and run them on low heat for about 20 minutes.  Then I take out the diapers (usually almost dry at this point) and the liner and dry the inserts and doublers a little longer.  Usually the doublers will still be damp so I hang them to finish drying.  I store everything in a large basket in the bathroom (where I change diapers) and sort them into smaller baskets when I have a minute.  It really is convenient and not throwing so much away just feels good.
One of my biggest fears about cloth diapering was what to do with poop!  I didn't want to get a toilet sprayer attachment- that just seemed so messy and gross.  When Audrey was not on solids yet, the poop would simply wash away in the laundry.  Once she got older I started changing her in the bathroom (more convenient for practicing early potty training or elimination communication) where I could dump any solids into the toilet.  Now that she is 2, she is pooping in her diaper less and using the toilet more and when she does mess up and use her diaper it is usually easy to just plop it in the toilet.  The poop aspect of cloth diapering is not pleasant but for me it was not a deal breaker.  Also, it is your child's poop and as a mom God gives you a special grace to deal with it!

To determine the number of cloth diapers to purchase count (or estimate) how many diapers you use within a 24 hour period.  Then determine how often you want to wash and give yourself a cushion to allow for the washing and drying time.  We started out using 12 diapers and then felt the need to add 6 more.  Eighteen was certainly enough for our frequency of washing.  To determine the number of wipes to buy estimate how many wipes you use at each change and multiply that by how many changes you will need between washings.  You really never can have too many cloth wipes as they can be used for household cleaning as well as for diaper changes.  While my daughter is on the toilet I will often grab a wipe to clean the mirror or wipe down the counter and just toss it in the diaper pail when finished.  Cloth wipes are so economical and are such a step up from disposable ones!

Websites selling cloth diapers abound!  I have found that larger sites such as Kelly's Closet are a one stop shop, often offering free shipping with a minimum order.  They also carry all the accessories you will need such as doublers, diaper pail liners, etc and even cloth products for mommies too!